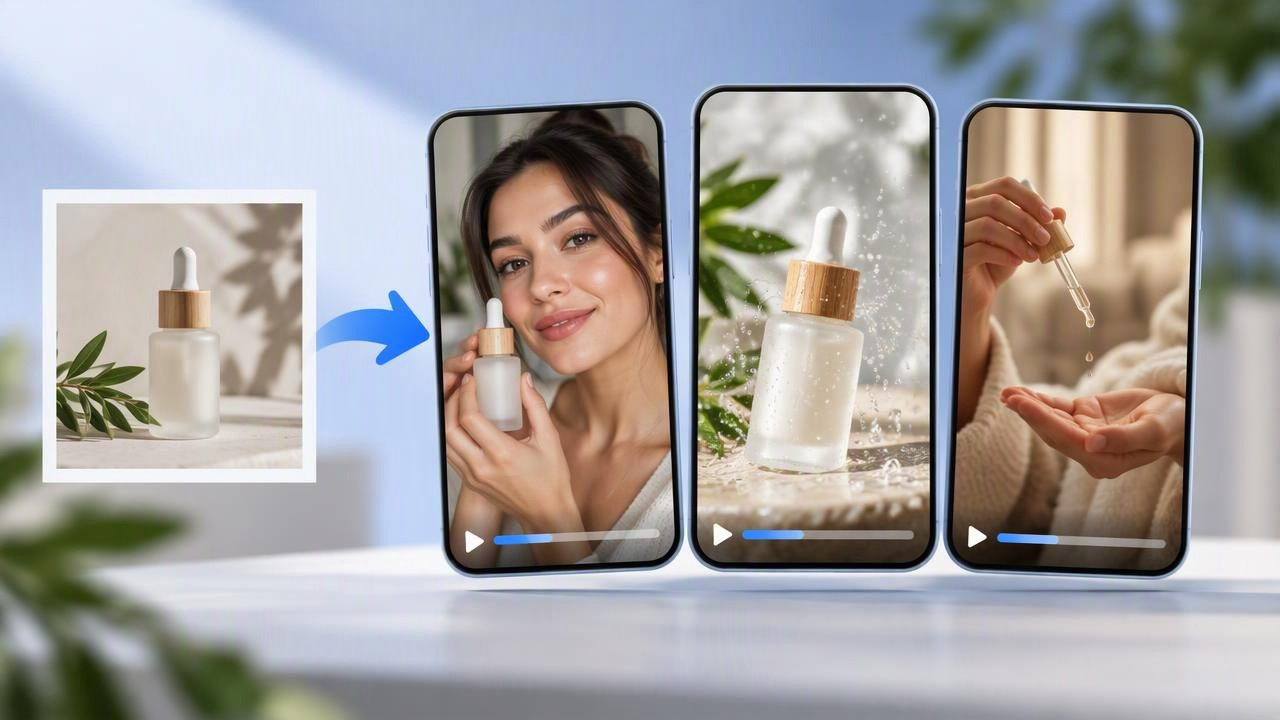
A single product photo can be a useful starting point for video marketing, especially when you want to explore different creative directions before arranging a full shoot. A product photo video maker can help turn that image into several AI-generated, UGC-style video concepts—but the output is a creative draft, not proof of how a product performs or a substitute for checking every visual detail.
The practical goal is not to make three near-identical clips. It is to use the same source image to explore three distinct ways of introducing a product, then compare those concepts against your audience, message, and brand standards. This guide walks through a concrete example, explains what to evaluate, and covers the limitations that matter before you publish.
What “one image into three videos” should mean
For a useful comparison, keep the product and core claim consistent while changing the creative angle. For instance, one concept might introduce a common problem, another might focus on a product feature, and a third might show how the item fits into a routine. This creates a clearer comparison than changing the product, audience, offer, and script all at once.
AI-generated UGC-style videos can help visualize possible hooks, pacing, and presentation. They should not be mistaken for genuine customer-created content. If a video depicts a person, setting, or use case that was generated, do not present it as a real customer testimonial or as evidence that someone used or recommended the product.
A concrete example: one skincare bottle, three concepts
Imagine an online shop has one clear front-facing photo of a fragrance-free moisturizer bottle. The label is readable, the container is unobstructed, and the image has a plain background. The team wants to explore short social video ideas, but it has not filmed a creator or collected customer footage.
It can use the image as a visual reference and develop three hypothetical creative concepts. The sample lines below are prompts for creative exploration, not verified claims or actual product results. Any statement about ingredients, suitability, or effects must be checked against product documentation before it appears in published content.
| Concept | Creative direction | Example opening | What to review |
|---|---|---|---|
| Problem-led | Start with a familiar skincare decision, then introduce the bottle. | “Looking for a simple moisturizer to add to your routine?” | Does the question suit the intended audience without implying an unsupported problem or result? |
| Feature-led | Make the packaging or a confirmed product detail the focus. | “Here’s a closer look at this fragrance-free moisturizer.” | Is “fragrance-free” accurate, and does the generated label match the real package? |
| Routine-led | Show the product as a possible part of a daily routine. | “A quick look at where this moisturizer could fit in a routine.” | Does the scene avoid suggesting an unverified method, result, or personal experience? |
These are concept distinctions, not three guaranteed finished ads. The source image may help establish the bottle’s appearance, but it does not establish how the moisturizer feels, how people respond to it, or whether it achieves a particular skincare outcome.
How to compare the three concepts fairly
Before generating or reviewing variations, write down what should stay fixed. In this example, keep the product identity, audience, primary message, and approximate video length consistent. Vary one main creative choice at a time, such as the opening angle. If every element changes between versions, it becomes difficult to understand what made one concept more suitable.
- Check product fidelity. Compare the bottle, label, color, cap, and proportions with the source photo and actual product. Look for invented text, altered packaging, visual distortions, or a product that changes shape between frames.
- Check claim accuracy. Confirm every spoken or on-screen statement against approved product information. A generated scene cannot verify a benefit, ingredient, performance claim, or customer outcome.
- Assess the opening. Ask whether the first few seconds make the subject clear and give the intended viewer a reason to keep watching. A lively visual is not automatically a relevant hook.
- Review tone and context. Does the concept feel appropriate for the brand and product? Does it imply a real person’s opinion, use, or endorsement when that is not true?
- Check readability and accessibility. Review captions, on-screen text, contrast, pacing, and whether the message can be understood without sound.
- Choose a next step. Keep concepts that are accurate and worth developing. Revise or discard versions with unclear messaging, misleading implications, or noticeable visual errors.
A simple comparison sheet can help keep feedback specific. Rate each version against the same criteria—such as message clarity, product accuracy, brand fit, and ease of understanding—and add a written note explaining each rating. Treat this as an internal creative review, not a prediction of engagement or sales.
What makes a product photo a useful starting point?
A sharp, well-lit image with the full product visible usually gives a video workflow more visual information to work from than a blurry or heavily cropped photo. A straightforward angle can make it easier to compare the generated product appearance with the real item. If packaging details matter, provide a source image where the label is legible rather than assuming a generated version will reproduce small text correctly.
One image also has limits. It shows only one angle and one moment. It cannot reliably supply missing views of the back label, product texture, scale in someone’s hand, or how a product is used. A system may fill in visual gaps, but those additions should be treated as generated content—not as confirmed product photography.
When exact details are important, use genuine product footage or additional approved images for those details. For example, a single front-facing bottle photo may be enough to explore a few introductory concepts, but it is not a sound basis for presenting a close-up of ingredients or a detailed application demonstration that the photo does not show.
Creative examples versus actual product results
Keep the distinction clear in both production and publication. A generated person saying, “I use this every morning,” can imply a real first-person experience. Unless that statement comes from a genuine, authorized testimonial, it should not be presented as one. Likewise, a before-and-after scene or a visual suggesting a measurable product outcome needs appropriate evidence; an AI-generated image is not evidence.
Safer creative framing describes what the video actually shows: the packaging, a verified feature, or a clearly illustrative scenario. Label or otherwise contextualize synthetic scenes when needed so viewers are not misled about who created the content or whether the depicted experience is real. Review advertising, disclosure, and platform requirements that apply to your market and placement.
Limitations to consider before choosing a maker
- Image quality shapes the starting point. Poor lighting, reflections, tiny packaging, and clutter can make it harder to judge the product in generated scenes.
- Generated details can be wrong. Labels, hands, objects, backgrounds, and movement may look inconsistent. Inspect the complete video, not just its thumbnail.
- A concept is not a performance result. Three versions give you creative options; they do not establish which will earn more views, clicks, or purchases.
- One image cannot show every feature. Do not imply that a generated angle, demonstration, or product use is verified if it is absent from approved source material.
- Production needs vary. A draft for internal review may be acceptable with unresolved details, while a public-facing ad requires careful accuracy, rights, and disclosure checks.
Choosing the best product photo video maker for this task
Rather than choosing by the promise of instant volume, assess whether a tool and workflow help you make a meaningful, reviewable comparison. Look for a clear way to guide creative direction, inspect outputs, and revise concepts where available. Check what inputs and controls are actually offered; capabilities differ, so do not assume every maker supports the same formats, editing options, or publishing destinations.
Also consider who will review the work. A marketer may judge the hook and audience fit, while a product or compliance reviewer checks claims and packaging. Plan for that review before production, and keep the original image and approved product facts available alongside the generated drafts. This makes it easier to spot where a visual idea has drifted from the real item.
For a related explanation of the source-image workflow, see UGCMade’s guide to turning a product photo into video. The right process still depends on your source assets, review standards, and intended use.
Make the comparison useful
The best product photo video maker to turn one image into three videos is one that supports a disciplined creative test—not simply the largest number of outputs. Start with a clear image, define one consistent message, and explore three genuinely different angles. Then check every concept for product accuracy, claim support, tone, readability, and honest presentation.
Use the resulting videos as creative options to review, not as customer evidence or forecasts. If a concept is promising but depends on details the source image cannot verify, revise it or capture real footage. That balance lets teams explore visual storytelling efficiently while keeping published content grounded in what they can substantiate.
