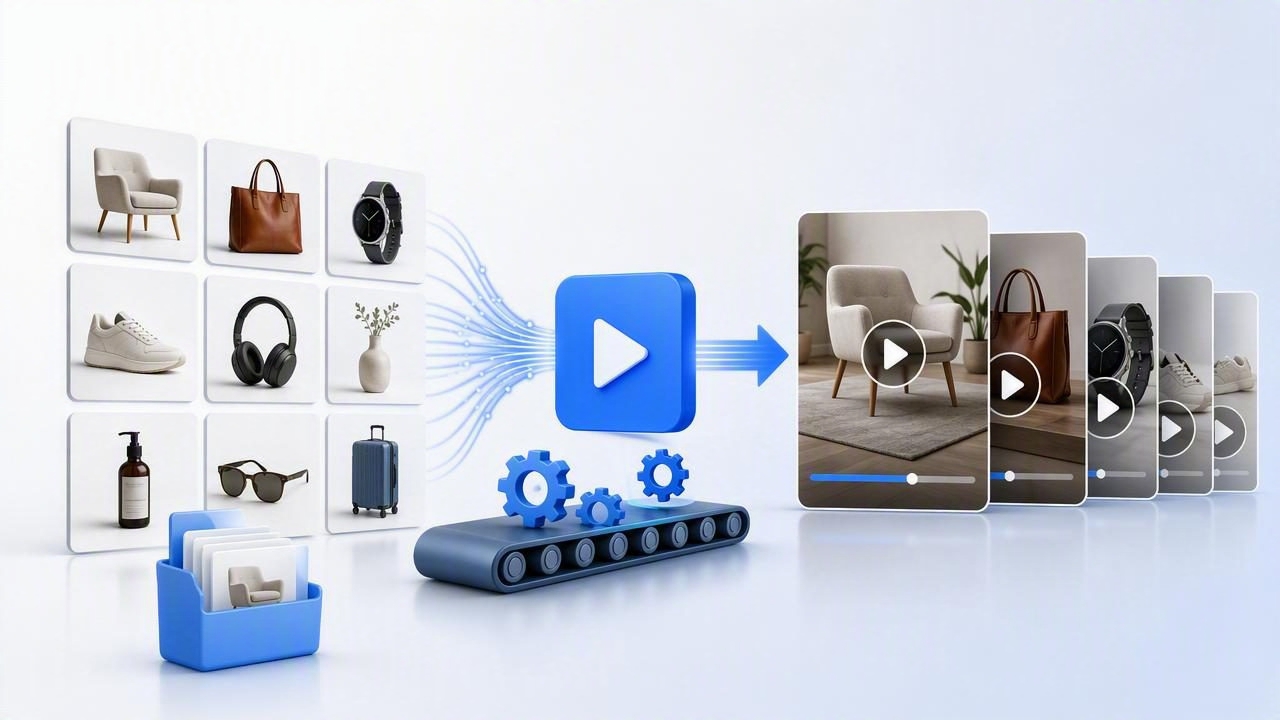
If you manage a growing product catalog, turning static images into motion is one of the highest‑leverage upgrades you can make. When you batch convert catalog photos into videos, you unlock faster production, consistent branding, and measurable lifts in click‑through and conversion across PDPs, ads, marketplaces, and social. This guide shows you the practical workflow—from prep to automation—so you can scale video output without scaling stress.
Why Batch Conversion Matters
- Scale and speed: Produce dozens or hundreds of product videos in hours, not weeks.
- Consistency: Uniform formats, pacing, fonts, and brand elements build trust.
- Channel coverage: Generate 9:16, 1:1, and 16:9 variations from the same source set.
- Conversion lift: Motion highlights features, materials, and size better than static images.
- Search and visibility: Video assets can improve discoverability on marketplaces and social.
“Consistency scales trust. Trust scales conversion.”
When You Should Batch Convert Catalog Photos into Videos
- Seasonal campaigns: Rapidly spin up videos for a holiday sale or product drop.
- Marketplace upgrades: Enhance Amazon or Walmart listings with clean, compliant clips.
- Retargeting creatives: Create multiple hooks per SKU for ad testing.
- International rollouts: Duplicate formats while swapping localized copy and prices.
- UGC shortages: Bridge the gap when you lack fresh influencer or studio content.
Prep: Turn a Static Catalog into a Video‑Ready Kit
1) Asset Audit Checklist
- Resolution: Minimum 2000px longest side; RAW or least-compressed JPEG/PNG.
- Angles: Front, back, side, detail, lifestyle. Aim for 4–7 images per SKU.
- Backgrounds: Prefer clean, consistent backdrops for batch processing.
- Licenses: Confirm rights for models, fonts, and music you plan to use.
2) Naming Conventions That Power Automation
Use a predictable scheme so your scripts or tools can map assets to products and overlays:
- Folder per SKU:
/catalog/SKU123/01.jpg,02.jpg,detail.jpg - Global assets:
/brand/fonts/,/brand/overlays/,/brand/music/ - Export target:
/exports/{channel}/{sku}/{variant}.mp4
3) A Metadata Spreadsheet Blueprint
Centralize all text overlays, hooks, CTAs, and price variations. A simple CSV works well:
sku,title,subtitle,price,feature_1,feature_2,cta,hex_color,track
SKU123,Everyday Tote,Roomy. Durable. Recycled.,$49,Water-resistant,Machine washable,Shop now,#111111,lofi_01.mp3
SKU124,Merino Tee,Soft. Breathable. Odor-safe.,$39,100% merino,Flatlock seams,See colors,#0A2E36,acoustic_02.mp3
This sheet lets you merge copy with assets when you batch convert catalog photos into videos.
Creative Recipes You Can Scale
Recipe A: 6–10s PDP Loop (Silent Autoplay)
- Open: Packshot with subtle zoom‑in (1.02–1.06x over 2–3s).
- Detail: Material close‑up with animated label “100% Merino”.
- Lifestyle: Real‑world use shot, bottom‑third caption (“Fits 15" laptop”).
- End: Logo bug appears; loop seamlessly.
Specs: 1:1 or 16:9, H.264 MP4, muted, under 20 MB if embedded on PDP.
Recipe B: 9:16 Social Ad (15s)
- Hook (0–2s): Bold text overlay—“Spills? No problem.”
- Feature (2–8s): Rotate through 3 images with kinetic text and iconography.
- Proof (8–12s): Quote snippet—“So roomy!”
- CTA (12–15s): Price and button graphic.
Use audio ducking, captions, and safe areas for UI overlays.
Recipe C: 1:1 Feed Video (8–12s)
- Sequence: packshot → feature detail → colorway grid → CTA.
- Design: large readable typography, 3–5 words per frame.
Technical Specs That Keep You Out of Trouble
| Channel | Aspect Ratio | Resolution | Duration | Notes |
|---|---|---|---|---|
| TikTok/Reels/Shorts | 9:16 | 1080×1920 | 6–15s (ads), up to 60s organic | Keep text in safe areas; use captions; MP4 H.264 + AAC. |
| Instagram/Facebook Feed | 1:1 or 4:5 | 1080×1080 or 1080×1350 | 6–15s | Assume sound‑off; burn‑in key captions. |
| YouTube (Horizontal Ads) | 16:9 | 1920×1080 | 6–15s bumper; 15–30s in‑stream | Show brand within first 2 seconds; clear hook. |
| Amazon PDP | 16:9 | 1920×1080 (1280×720 min) | Up to 45–60s | Clean background; no URLs or promotions; readable claims. |
| Shopify PDP | 1:1 or 16:9 | 1080p+ | 5–15s loop | Autoplay muted; keep under ~20–30 MB for speed. |
General encoding tips: H.264 baseline/high profile, 10–20 Mbps for 1080p source exports (you can optimize down for web), AAC audio 128–192 kbps, and yuv420p pixel format for broad compatibility.
Automation Options: No‑Code to Pro
No‑Code and Low‑Lift
- Template‑driven editors: Choose a video template, import a folder or CSV, and let the tool auto‑populate images, text styles, and durations.
- Batch export presets: Set variants (9:16, 1:1, 16:9) and let the system render all SKUs across aspect ratios.
- Spreadsheet merge: Map columns like title and price to text layers; use formulas for dynamic price badges (e.g., add a sale strikethrough when discount exists).
Scripted Approach (FFmpeg Example)
If you’re comfortable with a terminal, a simple script can turn each SKU folder into a 9:16 video with light motion and a concatenated sequence. This example assumes a folder structure like /catalog/SKU123/ with JPGs inside:
#!/usr/bin/env bash
set -euo pipefail

MUSIC="brand/music/lofi_01.mp3"  # optional, ensure you have rights

for dir in catalog/*; do
  [ -d "$dir" ] || continue
  sku=$(basename "$dir")
  tmp="$dir/tmp"
  mkdir -p "$tmp"
  listfile="$tmp/list.txt"
  > "$listfile"

  i=0
  for img in "$dir"/*.jpg "$dir"/*.jpeg "$dir"/*.png; do
    [ -f "$img" ] || continue
    i=$((i+1))
    # Create a 3s clip per image, scaled to 1080x1920 with gentle zoom
    ffmpeg -y -loop 1 -t 3 -i "$img" \
      -vf "scale=1080:1920:force_original_aspect_ratio=decrease,pad=1080:1920:(ow-iw)/2:(oh-ih)/2,zoompan=z='min(zoom+0.0015,1.06)':d=90:s=1080x1920" \
      -r 30 -c:v libx264 -pix_fmt yuv420p "$tmp/$i.mp4"
    echo "file '$tmp/$i.mp4'" >> "$listfile"
  done

  # Concatenate clips
  ffmpeg -y -f concat -safe 0 -i "$listfile" -c copy "$tmp/concat.mp4"

  # Optional: add music with low volume and trim to video length
  if [ -f "$MUSIC" ]; then
    ffmpeg -y -i "$tmp/concat.mp4" -stream_loop -1 -i "$MUSIC" \
      -filter_complex "[1:a]volume=0.18[a1];[0:a][a1]amix=inputs=1:duration=first" -shortest \
      -c:v copy -c:a aac -b:a 160k "exports/vertical/${sku}_9x16.mp4"
  else
    mkdir -p exports/vertical
    mv "$tmp/concat.mp4" "exports/vertical/${sku}_9x16.mp4"
  fi

  rm -rf "$tmp"
  echo "Rendered ${sku}"
done
Notes: adjust zoom strength for subtle motion; swap aspect ratio settings to render 1:1 or 16:9 variants; replace music with licensed tracks; and consider adding drawtext filters to overlay dynamic titles from your CSV.
Captions, Music, and Voice at Scale
- Captions: Provide burned‑in captions for sound‑off environments; keep lines under ~32 characters and high contrast.
- TTS voiceover: Script 1–2 lines per scene. Prioritize clarity over flourish; compress to -16 LUFS and duck music by 6–9 dB.
- Music: Use short loops (8–15s). Verify commercial rights. Keep RMS low to avoid clipping after platform normalization.
Quality Assurance and Versioning
- Readability: Minimum 42–48 px font height on 1080p; test on small phones.
- Safe areas: Keep text away from UI overlays (bottom nav, captions, CTAs).
- Compression: Check for banding on gradients; add light grain if needed.
- Color: Convert to sRGB; avoid oversaturation that misrepresents product.
- Claims: Ensure compliance on marketplaces (no superlatives that violate policy).
- File names: Include sku, ratio, duration, and version (e.g.,
SKU123_9x16_15s_v2.mp4).
Measure and Iterate
Use a simple framework to improve each batch:
- Hook rate: Percentage of viewers who watch past 2 seconds. Optimize first frame and text.
- Thumb‑stop and dwell: For feeds and PDPs, measure play time against page time.
- CTA CTR: Test 2–3 CTA wordings per SKU.
- Naming + UTM hygiene: Map performance back to specific variants and hooks.
Common Pitfalls (and Fixes)
- Busy overlays: Fix by reducing to one message per scene.
- Inconsistent pacing: Standardize scene durations (e.g., 2–3s each) across the batch.
- Stretched images: Always scale with aspect‑ratio preservation and pad instead of stretch.
- Heavy files: Cap exports to 8–12 Mbps for 1080p social; test load times on mobile.
- Non‑compliant claims: Maintain a review checklist for marketplace submissions.
Mini Case Study
A home goods brand with 180 SKUs needed PDP videos ahead of a seasonal push. They prepared a clean folder structure and a CSV with titles, price points, and two features per product. Using a template‑based workflow, they produced three variants per SKU (9:16, 1:1, 16:9) in two days. After deployment, they saw:
- +18% increase in PDP add‑to‑cart rate on SKUs with silent 8‑second loops
- +27% lift in social ad thumb‑stop rate with a stronger 2‑second hook
- 20–30% lower cost per add‑to‑cart by rotating three hooks per product
Key learning: the first frame and the shortest readable message had the largest impact. They now schedule a monthly batch to keep creative fresh while preserving the same structure.
FAQ
How many images do I need per product?
Four to seven is the sweet spot: packshot, 2–3 details, a lifestyle image, and an alternate angle or colorway. Fewer images can work with longer holds and text overlays; more images risk pace too fast to read.
What’s the ideal length?
For social ads, 6–15 seconds. For PDPs, 5–10 seconds looped and muted. For marketplaces, up to 45–60 seconds with clear, policy‑compliant messaging.
Can I repurpose one master into multiple aspect ratios?
Yes—design in a safe 1:1 center area so you can crop to 9:16 and 16:9 without losing critical copy or the product.
Should I use transitions or keep it simple?
Keep it simple. Gentle push/zoom and cross‑dissolves usually outperform flashy transitions and reduce compression artifacts.
Putting It All Together
To successfully batch convert catalog photos into videos, focus on three pillars: preparation (clean assets and metadata), predictable creative recipes (so you can iterate), and automation (no‑code templates or light scripting). Start with a small subset of SKUs, validate performance, then scale the same blueprint across your catalog and channels.
If you prefer an AI‑first tool purpose‑built for this workflow, UGCMade helps transform product photos into engaging videos at scale, reducing manual steps while preserving brand consistency.
