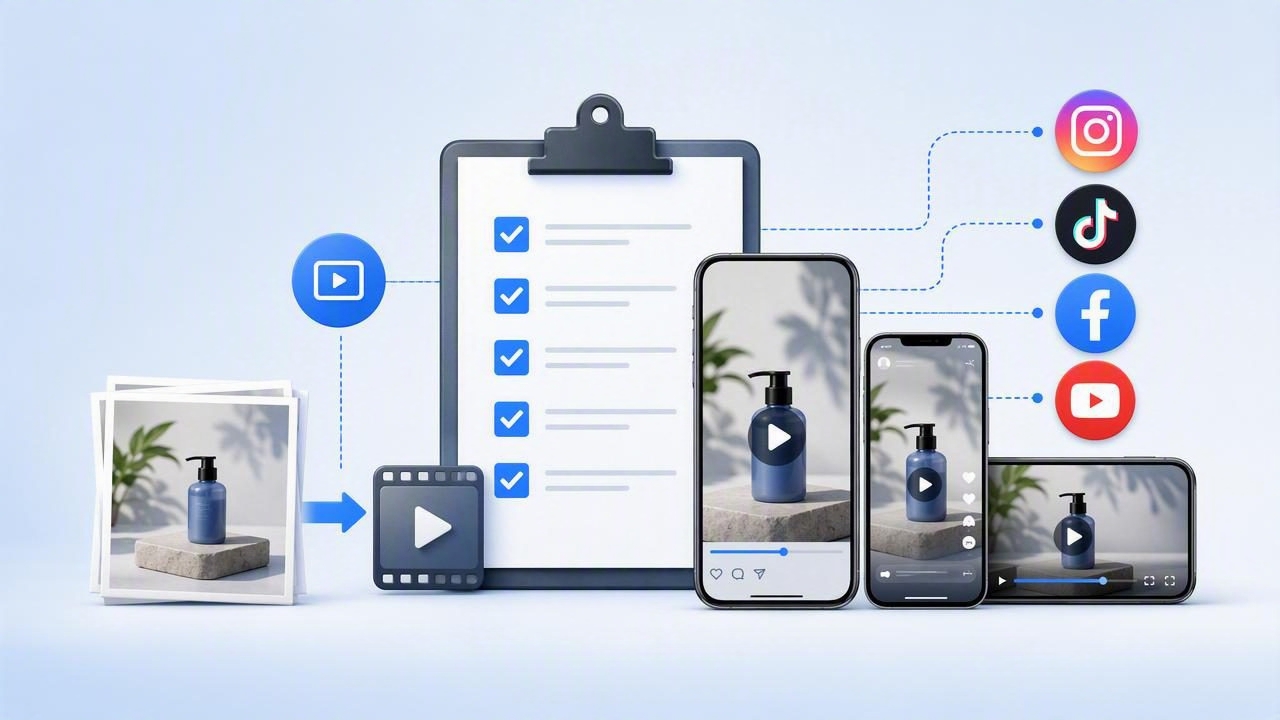
Creating strong product videos no longer requires a large production crew, advanced editing skills, or a separate campaign for every social network. With the right process, a single set of high-quality product photos can become a flexible library of videos for TikTok, Instagram, YouTube, Facebook, Pinterest, ecommerce product pages, and paid ads.
The challenge is not simply turning an image into motion. Brands need to make videos for multiple platforms while preserving visual quality, adapting to audience behavior, and maintaining a consistent message. This photo-to-video platform checklist helps marketers, ecommerce teams, and content creators plan an efficient workflow that turns static product photography into platform-ready video marketing assets.
Why Multi-Platform Video Creation Needs a Checklist
Every platform has different expectations. A product clip that performs well as a fast TikTok may need a clearer product demonstration for a Facebook ad or a more polished, detailed format for a product detail page. Reusing the same exact file everywhere can save time, but it can also limit reach and brand engagement.
A checklist creates a repeatable system. Instead of producing content from scratch for each channel, your team can begin with one core visual story and make purposeful adjustments. This approach supports faster content creation, more consistent product messaging, and more opportunities to test creative variations.
Effective visual storytelling is not about making every video identical. It is about making every version feel native to the place where it appears.
Step 1: Define the Goal Before Animating Product Photos
Before selecting templates, transitions, or music, identify what the video needs to accomplish. A clear goal affects the footage you prioritize, the text you add, and the call to action you use.
- Awareness: Stop scrolling with a visually striking product reveal, lifestyle image, or surprising transformation.
- Consideration: Show how the product works, what problem it solves, or what makes it different.
- Conversion: Feature a clear benefit, offer, social proof element, and direct call to action.
- Retention: Share care tips, new ways to use the product, or complementary product recommendations.
For example, a skincare brand may turn a clean product photo into a six-second video focused on texture and glow for social discovery. The same image set can become a 20-second routine walkthrough for an ecommerce landing page. The product is unchanged, but the story and viewer intent are different.
Step 2: Audit Your Product Photography Assets
The quality of a photo-to-video result starts with the source images. Motion effects can add energy, but they cannot fully compensate for blurry, inconsistent, or poorly lit product photography. Organize your assets before production so that you can build several video variations quickly.
Essential photo types to collect
- Clean product-on-background images for clear identification
- Close-up detail shots that show texture, materials, ingredients, or craftsmanship
- Lifestyle photos that place the product in a real-world context
- Scale images that clarify size or quantity
- Before-and-after or problem-and-solution visuals where appropriate
- Packaging, unboxing, or bundle photos for ecommerce campaigns
Check for consistent color, lighting, and logo placement. If you plan to crop images vertically, make sure the product remains visible near the center of the frame. A wide desktop banner may look excellent on a website but lose its most important detail when converted to a 9:16 vertical video.
Step 3: Build One Core Video Story
Start with a core version that communicates one idea clearly. Do not try to fit every feature, claim, and product angle into a short video. Strong product videos usually follow a simple sequence:
- Hook: Open with a compelling visual, question, result, or pain point.
- Product introduction: Show the item quickly and clearly.
- Key benefit: Demonstrate the main use case or outcome.
- Proof or detail: Add a close-up, review excerpt, feature callout, or comparison.
- Call to action: Tell viewers what to do next.
For a reusable water bottle, the hook might be: “Cold drinks, even after your commute.” The next frames can show the bottle, a close-up of the lid, a lifestyle image on a desk, and a final message such as “Choose your color.” This is a compact narrative that can be resized and edited for multiple channels.
Step 4: Use Platform-Specific Specs and Viewing Habits
Video dimensions matter, but format adaptation goes beyond aspect ratio. Captions, pacing, thumbnail choices, and safe zones all influence performance. Use the following guidelines when preparing your exports.
| Platform or Placement | Recommended Format | Best Length | Creative Priority |
|---|---|---|---|
| TikTok | 9:16 vertical | 6–20 seconds | Fast hook, native-feeling text, movement |
| Instagram Reels | 9:16 vertical | 7–30 seconds | Visual polish, captions, shareable value |
| Instagram Feed | 4:5 or 1:1 | 10–30 seconds | Clear product framing and strong cover image |
| YouTube Shorts | 9:16 vertical | 15–45 seconds | Quick education, demonstrations, retention |
| Facebook Ads | 4:5, 1:1, or 9:16 | 10–30 seconds | Benefit-led message and readable branding |
| Product Pages | 1:1, 4:5, or 16:9 | 15–60 seconds | Product details, use cases, purchase confidence |
Keep important text away from the top and bottom edges of vertical videos, where platform controls and captions may overlap. Always preview exports on a mobile device, since most social video views occur on smaller screens.
Step 5: Adapt the Creative, Not Just the Crop
A common mistake is exporting the same video in several dimensions and considering the job complete. Resizing is useful, but true adaptation changes the message slightly for each audience and placement.
Ways to tailor one product story
- Use a bold question or trend-inspired opening for short-form social video.
- Lead with a practical product benefit for paid advertising.
- Add specifications, dimensions, or usage instructions to ecommerce videos.
- Use a slower pace and stronger brand context for YouTube or website content.
- Test different first frames, as the opening seconds often determine watch time.
For instance, a kitchen tool video could start with “Dinner prep in half the time” on TikTok, “Designed for faster slicing” in a paid ad, and “See every attachment in action” on a product page. Each version uses the same product photography and core motion design while meeting a different viewer need.
Step 6: Add Text, Audio, and Accessibility Layers
Many viewers watch social video with sound off, especially during the first seconds. That makes on-screen text essential for communicating your central benefit. Keep copy concise, high contrast, and large enough to read without zooming.
- Limit each text screen to one main message.
- Use captions when there is spoken dialogue or voiceover.
- Choose background music that supports the pace without overpowering narration.
- Confirm that product claims are accurate and compliant with your industry requirements.
- Use descriptive alt text when uploading video to channels that support it.
Accessibility improves usability and can also improve brand engagement. Captions help viewers in quiet environments, while clear visual hierarchy helps audiences understand the message quickly. If your video relies heavily on color to communicate meaning, add labels or text so the information remains understandable for more viewers.
Step 7: Create Variations for Testing
Photo-to-video workflows make creative testing more practical because the same source assets can support many versions. Instead of guessing which message will work, develop a small set of intentional variations.
Test one major element at a time, such as the opening image, headline, benefit statement, music choice, or call to action. Avoid changing everything at once, because you will not know what caused a performance difference.
Variation A: Lifestyle image first + “Made for busy mornings”
Variation B: Product close-up first + “Your 30-second routine upgrade”
Variation C: Result first + “Less mess. More time.”
For paid campaigns, review click-through rate, thumb-stop rate, cost per purchase, and conversion rate. For organic video, monitor watch time, completion rate, saves, shares, comments, and profile visits. The best-performing version can then guide future product photography and content creation decisions.
Final Pre-Publish Checklist
Use this final review before scheduling or launching a video campaign:
- Does the first frame make sense without audio?
- Is the product visible within the first few seconds?
- Does the format match the platform placement?
- Are captions, text overlays, and logos inside safe areas?
- Is the benefit specific and easy to understand?
- Are the visuals sharp after export and mobile preview?
- Does the call to action match the campaign objective?
- Have you created at least two variants for testing?
- Are file names organized by platform, product, and creative angle?
Turn Product Images Into a Repeatable Video System
The most efficient brands do not treat every product video as a one-off project. They build a content system: organized product photography, reusable story structures, platform-specific templates, and a regular testing process. This makes visual storytelling more scalable while keeping the brand experience consistent across every customer touchpoint.
A photo-to-video platform can help streamline the production stage, especially when teams need to create multiple product video formats quickly. Tools such as UGCMade can support that workflow by transforming existing product images into dynamic video assets that are easier to adapt, test, and publish across channels.
